How to add custom fonts in Visily
Add custom fonts to use your own brand or client-specific typography in Visily designs. Custom fonts can be uploaded at the workspace level for reuse across boards, or at the board level for use in one specific board.
Before you start
- Custom fonts are available on the Pro and Business plans.
- Supported font file formats include: TTF, OTF, and WOFF.
- Before uploading a font, make sure you own the font or have the right to use and upload it for your intended purposes, in accordance with Visily’s Terms of Service.
Custom font limits
Custom font limits depend on your workspace plan:
- Pro plan: Upload up to 5 Custom Fonts for each board canvas and up to 5 Custom Fonts in the Workspace Library.
- Business plan: Upload and use an unlimited number of Custom Fonts at both the board and workspace levels.
Upload custom fonts
You can upload custom fonts from either Workspace Library or Board Theme Settings, depending on where you want the fonts to be available. Workspace fonts can be reused across boards, while board fonts are available only in the current board.
Upload from Workspace Library
- Open the Workspace Library.
- Go to the Custom Fonts tab.
- Click Add font files, or drag and drop your font files into the upload area.
- Confirm that you have the rights to use and upload the fonts.
Upload from Board Theme Settings
- Open the board where you want to upload and use the custom font.
- Click Theme from the bottom toolbar.
- In the Text section of the board theme, select Edit texts.
- In any theme font field, such as Primary, Secondary, or Tertiary, open the font dropdown menu.
- Switch to the Custom tab, then choose one of the following options:
- Select Add font file if no custom fonts have been added yet.
- Select Manage custom fonts if custom fonts already exist and you want to upload another one.
- In the Manage custom fonts dialog, choose where you want to upload the custom font:
- This Board: Upload the font for the current board only.
- Workspace: Upload the font for use across the workspace.
- Click Add font file.
- Confirm that you have the rights to use and upload the font.

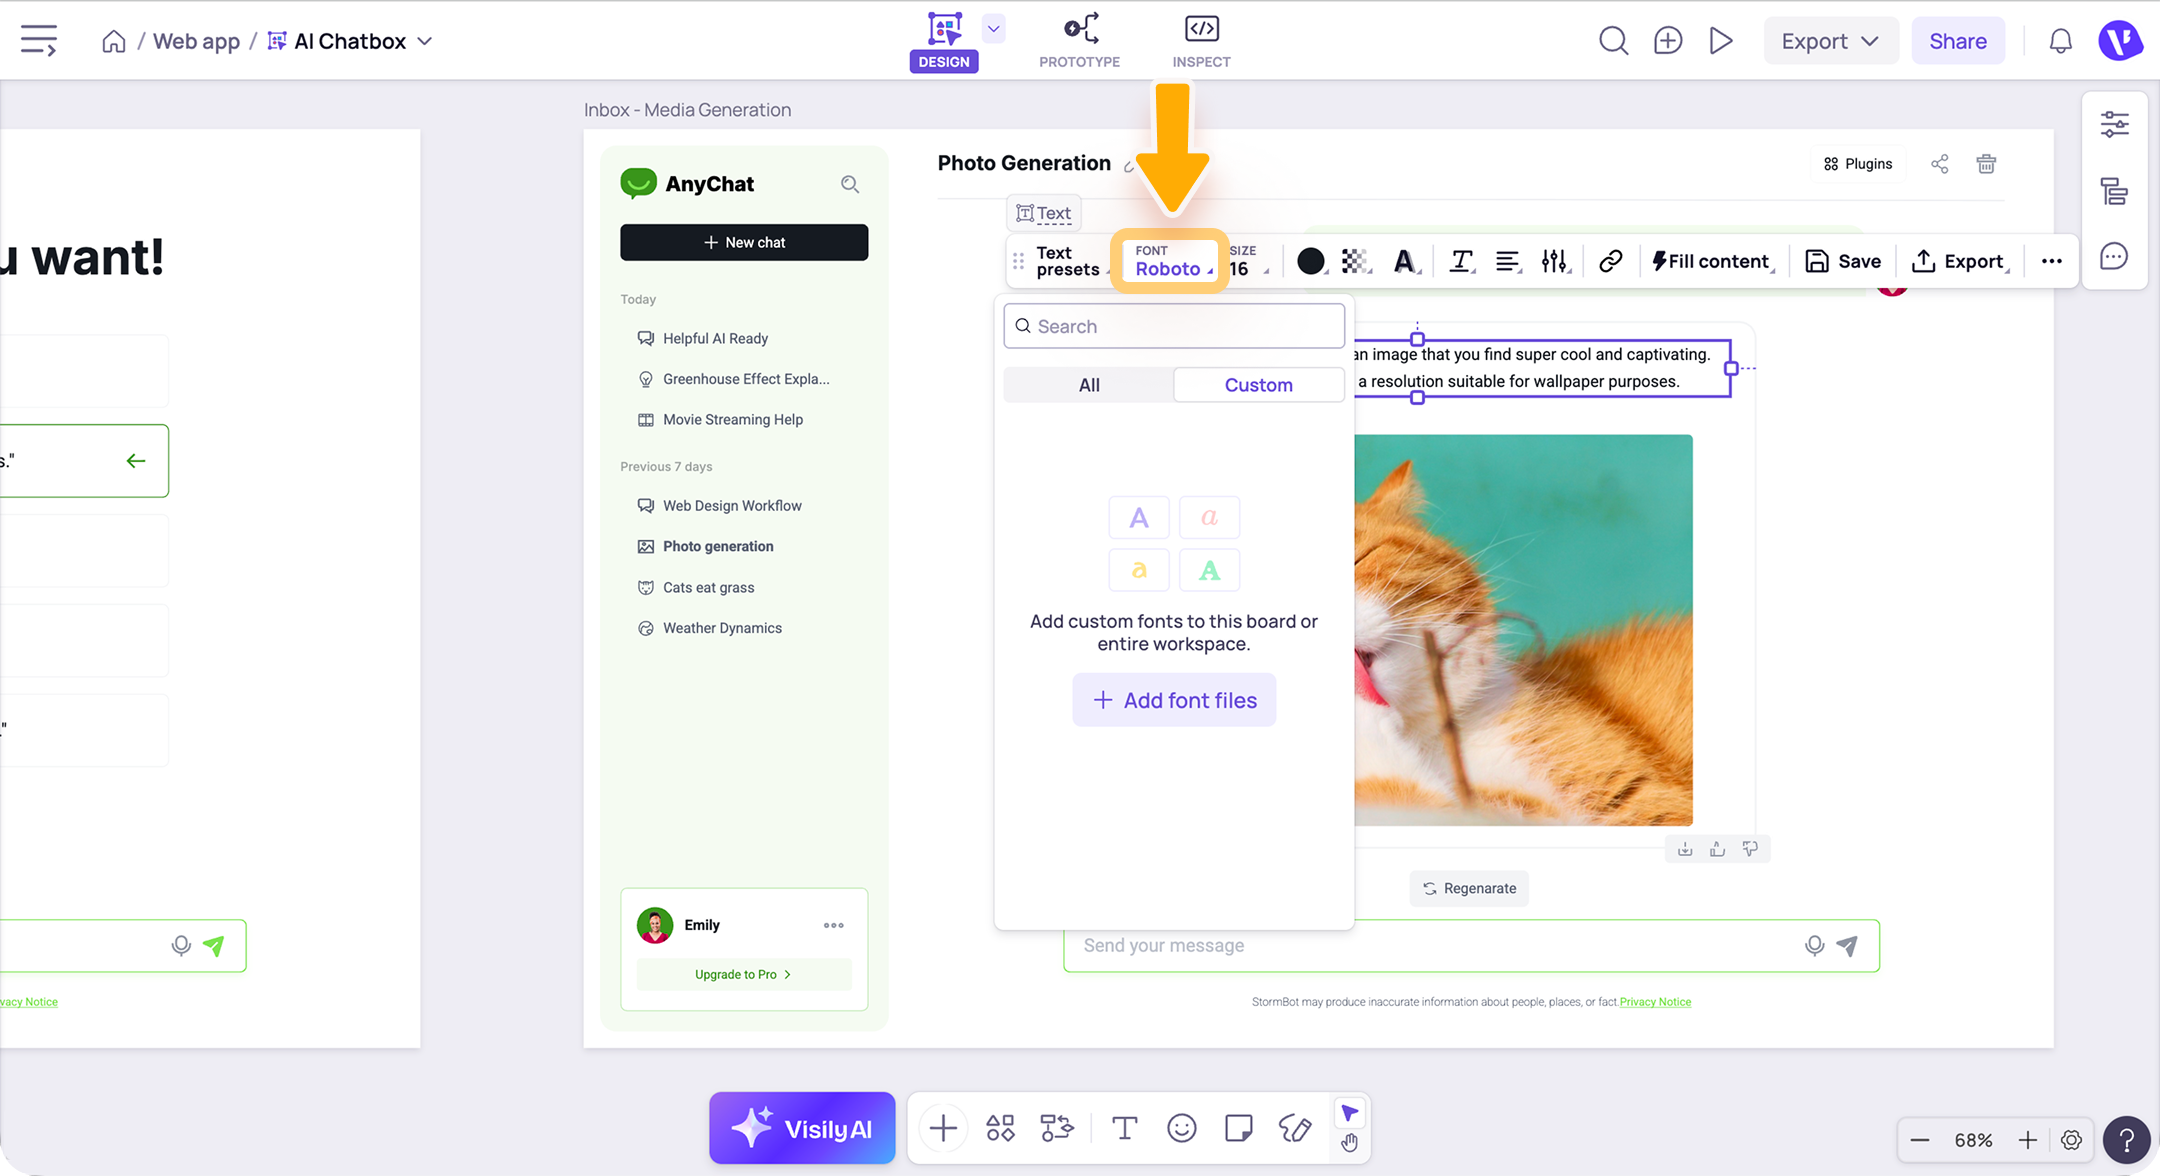
You can also add custom fonts by selecting a text element on the canvas, then opening the Font dropdown from the toolbar.
Use custom fonts in your design
After uploading a custom font, you can apply it to your board theme, workspace theme, or individual text elements.
- Use in a theme: Select the custom font for Primary Font, Secondary Font, Tertiary Font, or any text presets as needed. Apply the theme changes to update designs using that theme.
- Use in a text element: Select a text element on the canvas, then choose a custom font from the Fonts dropdown in the toolbar. The selected font is applied immediately to that element only.
Manage uploaded custom fonts
You can manage uploaded fonts from the Workspace Library or the Manage Custom Fonts dialog. Available actions may include:
- View uploaded fonts
- Upload more font files
- Delete a custom font

A replacement font must be selected before deleting a custom font. The replacement font will be applied across boards, themes, and text elements where the deleted font was used.
Note
- Workspace custom fonts are available across boards in the same workspace and appear in both Workspace Library and the Workspace tab of the Manage Custom Fonts dialog.
- Board custom fonts appear in the This Board tab of the Manage Custom Fonts dialog and are available only in the board where they were uploaded.
Need more help?
If this does not solve your issue, contact support and include a screenshot if possible.